How to Block Crochet Projects (Wet, Steam & Spray Methods)

The finishing step that turns a homemade-looking make into a professional one. Three blocking methods, when to use each, and how to block acrylic without ruining it.

12 min read Updated July 23, 2026 By Mira Holloway
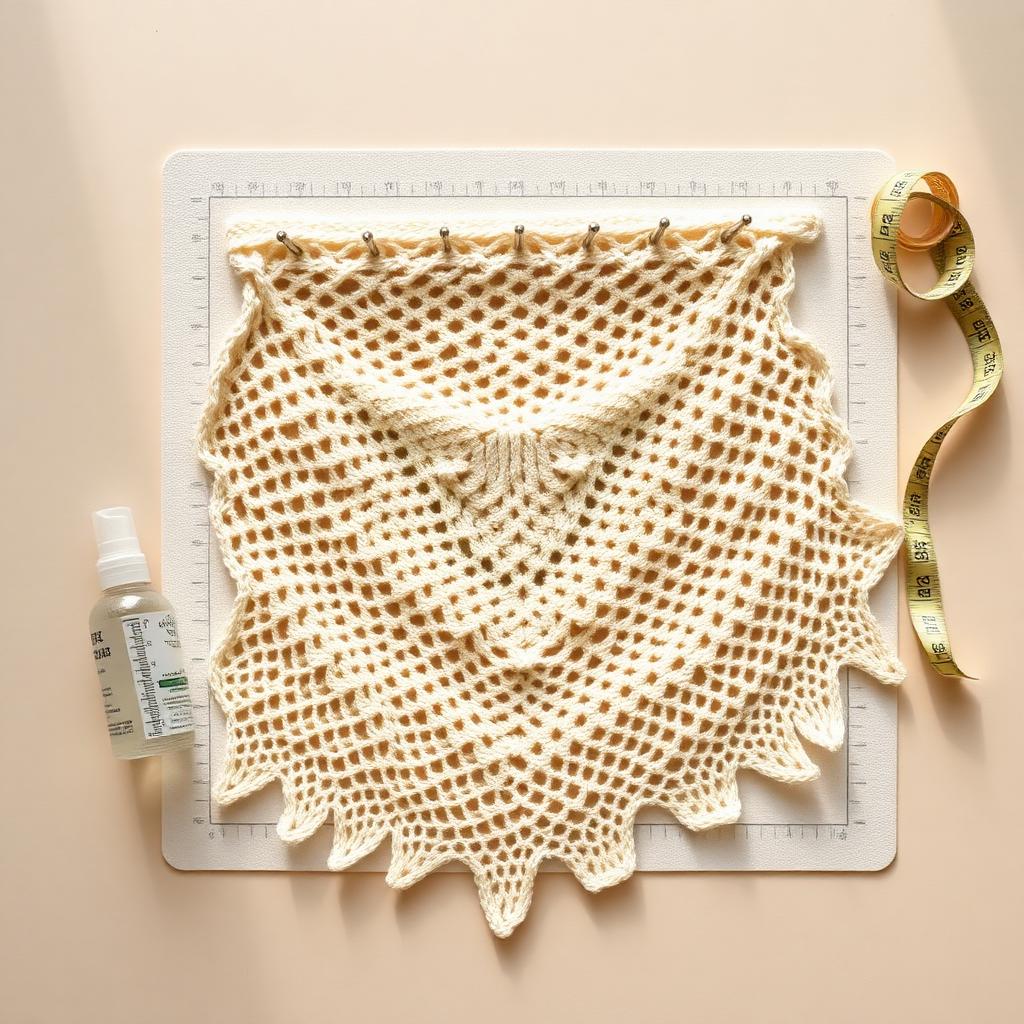
A cream crochet shawl pinned to a blocking mat with rust-proof T-pins, a spray bottle and measuring tape
Materials
  • Foam blocking mats or an old towel over a carpet
  • Rust-proof T-pins (the yellow ones are the standard)
  • A spray bottle filled with cool water
  • A basin or sink (for wet blocking)
  • A steam iron (for steam blocking) — do NOT let the iron touch the fabric
  • A tape measure
  • Optional: wool wash or a drop of gentle shampoo

Blocking is the difference between a project that looks 'nice, obviously handmade' and one that looks 'store-bought expensive.' It evens out stitches, straightens edges, opens up lace patterns, and settles the yarn into its final shape. Skipping it is like baking cookies and skipping the cooling rack — everything technically works, but the result is meaningfully worse.

When you should block

  • Anything with lace or open-work — blocking is what makes the pattern visible
  • Motifs like granny squares BEFORE joining them
  • Anything worn (shawls, garments, hats) — blocking opens up drape
  • Anything that looks slightly wonky, cupped or uneven off the hook

You can usually skip blocking on: chunky amigurumi, small utility items (dishcloths, coasters), and pieces that will be washed frequently anyway.

Method 1: Wet blocking (best for natural fibers)

Best for wool, cotton, linen, silk, and blends. Not for pure acrylic — see Method 3.

  1. Fill a basin with cool water and a small squirt of wool wash or gentle shampoo. Submerge the piece and gently press to soak — do not agitate or wring.
  2. Let it sit 15–20 minutes so the fibers fully absorb water.
  3. Drain the basin, gently press water out of the piece. Roll in a dry towel and press down to absorb more water — never wring.
  4. Lay the damp piece on your blocking mat. Shape it to the correct dimensions using a tape measure. Pin every corner first with T-pins, then pin the edges every inch.
  5. Let it dry completely — usually 12 to 24 hours depending on humidity. Do not remove pins early.

Method 2: Spray blocking (gentler, faster)

Best for pieces you don't want to soak — dyed yarns, delicate lace, or when you're short on time.

  1. Lay the piece on your blocking mat. Shape and pin to the correct dimensions.
  2. Mist all over with cool water from a spray bottle until damp but not soaked.
  3. Adjust pins if the fabric shifts as it absorbs moisture.
  4. Let dry completely — usually 6 to 12 hours.

Method 3: Steam blocking (works on acrylic)

The only blocking method that works on 100% acrylic. Also fast and effective on cotton or wool if you want to skip a full wet block.

  1. Lay the piece on a heat-safe surface (an ironing board or towel over a blocking mat).
  2. Shape and pin to correct dimensions.
  3. Hold a steam iron ONE INCH above the fabric — never touch it. Move steadily across the surface, letting steam penetrate the fibers.
  4. Do not press. Do not touch the iron down. Direct heat on acrylic 'kills' the yarn — it goes permanently limp and shiny.
  5. Let cool completely before removing pins (usually 30 minutes to 1 hour).
The 'killing acrylic' trick
Some crocheters deliberately kill acrylic to make stiff structural pieces (baskets, ornaments). Touch the iron directly, hold it there for a few seconds, and the acrylic permanently flattens into whatever shape you've pinned. Do this on purpose or not at all — it can't be undone.

Blocking granny squares

Block every square to the same size before joining a blanket. Use a template — a piece of cardboard cut to your target square size — and pin each square to match. This is the single biggest improvement you can make to a granny-square blanket.

Blocking shawls and lace

Lace patterns look closed and lumpy until they're blocked open. Wet-block and stretch aggressively — you want tension throughout the piece to open up every chain space. Blocking wires help enormously for straight edges on triangle shawls.
Project tips from the studio

  • Block before joining pieces, not after. Blocking 42 individual granny squares takes an evening; blocking a fully-joined blanket takes half a day.
  • Always pin corners before edges. Get corners square first, then adjust the sides between them — never the other way around.
  • Let it dry completely before moving. Removing pins early causes the piece to spring partly back to its unblocked shape and undoes the whole effort.

Troubleshooting

My blocked piece went back to its old shape.
You removed pins before it was fully dry, or the yarn contains a lot of acrylic which resists shaping without steam. Reblock with steam heat, and let it dry a full 24 hours.
The color ran during wet blocking.
Test dye-fastness on a swatch or an inconspicuous corner first. Set the color with a cold-water vinegar rinse (¼ cup vinegar per gallon of water) before wet blocking.
My acrylic piece flattened weirdly.
You killed the acrylic — direct high heat permanently deforms it. This is fine if you WANTED a stiff, drapey finish, but it can't be undone. Steam from a distance next time.

Frequently asked questions

Do I really need to block crochet?+

For lace, garments, and any project made of joined motifs — yes, blocking is what makes them look finished. For scrappy amigurumi, small utility items and heavily-textured pieces, you can skip it.

Can you block acrylic yarn?+

Only with steam, and only carefully. Acrylic doesn't respond to wet blocking, but held steam (not direct heat) will relax the fibers enough to set a new shape. Direct iron contact on acrylic permanently kills the yarn.

How long does blocked crochet stay in shape?+

Indefinitely for natural fibers like wool, cotton and linen. Steam-blocked acrylic will hold shape until it's washed, then usually needs re-blocking. Store blocked pieces flat when possible.

What size blocking mat do I need?+

For most projects, a set of four 12x12 inch interlocking foam mats is enough — you can arrange them to fit any shape. For blankets and shawls, buy a full-size set (roughly 24x24 inches total). A gridded surface makes measuring easier.

Can I block with an ironing board and towel?+

Yes, if you don't have foam mats. Cover the ironing board with a clean towel, pin your piece to the towel, and block as usual. Only downside is the small work surface — fine for hats and small squares, cramped for shawls or blankets.

Sources & content review
This article was written by our editorial team and reviewed against our editorial policy. All techniques are tested in our studio, and craft-terminology definitions cross-checked against the Craft Yarn Council standard yarn weight system and CGOA glossary.